
Share This Article
Opening your energy bill after a brutal cold snap or heat wave can feel like getting punched in the gut. Whether it’s your furnace working overtime in January or your air conditioner running nonstop in July, poor weatherization turns your home into an energy-draining money pit that costs you hundreds every year.
The good news is most weatherization projects are surprisingly simple and can slash your energy bills by 20-30% while making your home more comfortable year-round. You don’t need advanced skills or thousands of dollars—just a weekend and some basic supplies can make a dramatic difference in both your comfort and your wallet.
Fall Preparation for Winter Weather
Seal Air Leaks Around Windows and Doors
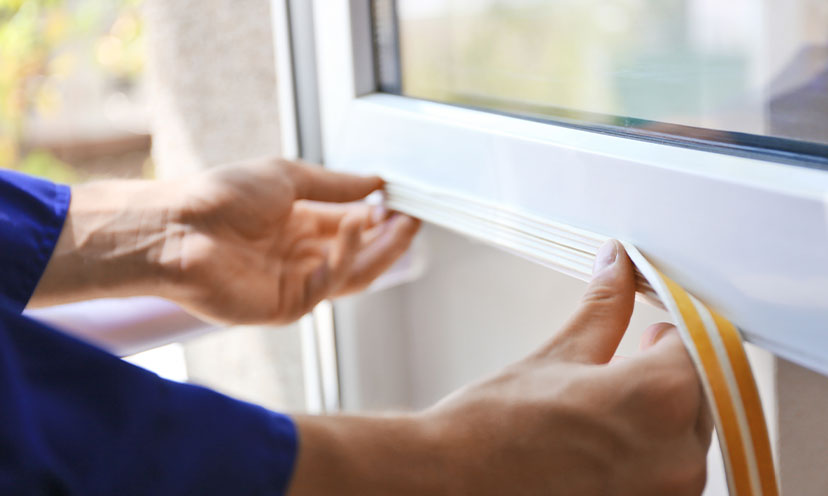
Start with the biggest energy wasters in your home: gaps around windows and doors. Run your hand around frames on a windy day and you’ll feel cold air rushing in through surprisingly small gaps. 3M Window Insulator Kits cost $6-10 per window and create an insulating air pocket that’s nearly invisible when properly applied.
For doors, check the weatherstripping around the frame and install a door sweep at the bottom if needed. Frost King door sweeps cost about $7-15 and can eliminate major drafts that make your heating system work overtime.
Insulate Your Attic Access
Your attic hatch or pull-down stairs are often completely uninsulated, creating a giant hole in your home’s thermal barrier. Attic stair covers cost $100-130 and pay for themselves quickly through energy savings. You can also make your own using rigid foam insulation and weatherstripping for about half the cost.
Check Your Heating System
Replace your furnace filter before the heating season begins. A dirty filter makes your system work harder and wastes money. Filters range from $5 for basic ones to $25 for high-efficiency versions that last longer. If your system hasn’t been serviced in over a year, schedule professional maintenance. A well-maintained system runs 10-15% more efficiently than a neglected one.
Protect Exposed Pipes
Frozen pipes aren’t just inconvenient: they can burst and cause thousands in water damage. Pipe insulation foam tubes cost under $2 per section and slip easily over pipes in unheated areas like basements, crawl spaces, and garages. This simple step prevents freezing and reduces heat loss from hot water lines.

Spring Preparation for Summer Heat
Service Your Air Conditioning System
Just like your heating system, your AC needs annual maintenance to run efficiently. Replace the filter, clean debris from around the outdoor unit, and check that interior vents aren’t blocked by furniture or rugs. A clean, well-maintained system can be 20% more efficient than a neglected one.
Schedule professional maintenance if your system is older or hasn’t been serviced recently. The cost typically ranges from $80-150 but pays for itself through improved efficiency and fewer repair bills.
Install Window Treatments for Solar Heat Control
Windows facing south and west turn your home into a greenhouse during summer months. Cellular shades cost $25-60 per window and can block up to 80% of solar heat gain while still allowing natural light into your rooms.
For a budget-friendly option, reflective window film costs $15-25 per roll and reduces heat gain significantly. Keep in mind that it may darken rooms more than cellular shades.
Seal Ductwork Leaks
Leaky ducts waste 20-30% of your conditioned air before it reaches your rooms. Check accessible ducts in basements, crawl spaces, or attics for gaps, loose connections, or damaged insulation. Mastic sealant costs $12-15 per container and works much better than duct tape for creating permanent seals.
Focus on connections where duct sections join together and where ducts connect to vents. These are the most common leak points in most homes.
Upgrade Attic Insulation
Poor attic insulation forces your AC to work overtime cooling air that immediately escapes upward through your ceiling. Most homes need R-38 to R-60 insulation values depending on your climate zone. Blown-in insulation costs about $1-2 per square foot when professionally installed.
For DIY installation, you can rent a blower from Home Depot for about $30 per day and buy the insulation material separately, cutting your costs roughly in half.
Year-Round Weatherization Projects
Caulk Exterior Gaps
Walk around your home’s exterior looking for gaps where different materials meet around windows, doors, where siding meets foundation, or where pipes and cables enter walls. Paintable acrylic caulk costs $3-5 per tube and handles most exterior sealing jobs. It can be painted to match your home’s exterior once it cures.
Pay special attention to areas where you can see daylight from inside your home or feel air movement on windy days.
Install a Programmable Thermostat
A programmable thermostat can save 10% annually on heating and cooling costs by automatically adjusting temperatures when you’re away or sleeping. Basic programmable models start around $25-40 and are relatively easy to install if you’re comfortable with basic electrical work.
Smart thermostats like Nest cost $200-250 but learn your schedule automatically and can be controlled remotely from your phone.
Weather-Strip Moving Parts
Any part of your home that moves (windows, doors, garage doors) develops gaps over time as materials shift and wear. Self-adhesive foam tape costs $3-8 per roll and works for most applications. The foam compresses to seal gaps when windows or doors close.
Replace weatherstripping when it becomes compressed, cracked, or no longer springs back to its original shape.
Professional vs. DIY Projects
Projects You Can Handle Yourself
Most weatherization work is DIY-friendly and requires only basic tools: caulking gaps, installing weatherstripping, adding attic insulation, applying window film, and sealing accessible ductwork. These projects can save hundreds annually and typically cost under $200 in materials.
When to Call Professionals
Leave major ductwork modifications, electrical work for smart thermostats, blown-in wall insulation, and HVAC system repairs to licensed professionals unless you happen to be a licensed contractor. The labor costs are worth it for safety reasons and warranty protection. Many utility companies also offer rebates for professional energy audits and improvements.
Seasonal Maintenance Schedule
Fall Tasks (September-November)
- Replace heating system filters and schedule furnace maintenance
- Check and repair weatherstripping around doors and windows
- Install storm windows or plastic window film for winter
- Clean gutters and downspouts to prevent ice dam formation
- Seal exterior cracks with caulk before cold weather arrives
Spring Tasks (March-May)
- Service air conditioning system and replace filters
- Install or clean window screens to enable natural ventilation
- Check attic ventilation to prevent summer heat buildup
- Remove plastic window film and store properly for next winter
- Inspect and repair any roof or siding damage from winter weather
Year-Round Filter Maintenance
Replace HVAC filters every 1-3 months, depending on system usage and filter type. Mark your calendar or set phone reminders—this simple task alone can improve system efficiency by 10-15% while extending equipment life.
Your Next Steps
Don’t try to tackle everything at once. Pick 2-3 projects that fit your budget and skill level, then build from there. Start with the quick wins like weatherstripping and caulking for immediate comfort improvements and energy savings.
Remember that weatherization isn’t just about saving money: it’s about making your home more comfortable to live in. Eliminating drafts, reducing hot and cold spots, and maintaining consistent temperatures throughout your house makes every season more enjoyable while keeping more money in your pocket.